Capturing screenshots while web scraping has different popular use cases, including competitor monitoring, AI vision analysis, and web pages' archiving. In this guide, we'll explain taking screenshots with Puppeteer. Furthermore, we'll explore common functonalities to customize a Puppeteer screenhot. Let's get started!
Installation
Let's start with the installation process. Puppeteer is a NodeJS package that's can be installed with the node package manager using the following command:
npm install puppeteerThe above command will install Puppeteer and download the requried WebDriver binaries. To verify the instalaltion, use the below command and yo should retrieve the installed Puppeteer package version:
npm list puppeteer
# └── puppeteer@23.2.1
Basic Usage
Let's start with the baseic functionalties enabling Puppeteer screenshots. For this, we can use the page.screenshot() method:
const puppeteer = require("puppeteer");

async function run() {
  // launch the browser, disable the headless mode, and open a page tab
  const browser = await puppeteer.launch({ headless: false });
  const page = await browser.newPage();

  // request the target web page
  await page.goto("https://web-scraping.dev/product/1");

  // take the screenshot
  await page.screenshot({
    type: "png", // specify the file extension
    path: "product.png", // specify the file path
  });

  browser.close();
}
run();
Above, we take a basic Puppeteer screenshot with the default settings in terms of the viewport and specify the file name and extension. Since taking screenshots is usually associated with dynamic websites, it's often useful to define waits to ensure a correct page load first:
async function run() {
  const browser = await puppeteer.launch({ headless: false });
  const page = await browser.newPage();

  await page.goto("https://web-scraping.dev/product/1");
  // wait for a CSS selector element
  await page.waitForSelector("h3.card-title", {timeout: 5_000});

  await page.screenshot({
    type: "png",
    path: "product.png",
  });

  browser.close();
}
Here, we wait for gull page load using the waitForSelector method to ensure the HTML element load before starting with the screenshot process.
Screenshot Customization
So far, we have explored taking Puppeteer screenshots with the default preferences. Next, let's see how to customize the screenshot page.
Resolution
One of the key settings to define when capturing screenshots is the resolution. This allows customizing the image quality using its height and width dimensions:
async function run() {
  const browser = await puppeteer.launch({ headless: false });
  const page = await browser.newPage();

  // Set the dimesions via width and height
  await page.setViewport({ width: 1920, height: 1080});
  await page.goto("https://web-scraping.dev/product/1");

  await page.screenshot({
    type: "png",
    path: "product.png",
  });

  browser.close();
}
Above, we use the setViewport method to set the width and height values to emulate a 1080p web page screenshot.
Full Page Screenshot
Taking a full page screenshot can be approached by replicating the whole page viewport. However, in Pupepteer we can simply use the fullPage parameter:
  // ....
  await page.screenshot({
    type: "png",
    path: "product.png",
    fullPage: true
  });
Note that the above parameter won't allow Puppeteer to screenshot full pages with infinite scroll. Therefore, the browser should handle infinite scroll first before taking the web page capture.
Element Screenshot
Instead of taking a screenshot with Puppeteer for the whole page viewport, we can capture screenshots of a particular html element:
async function run() {
const browser = await puppeteer.launch({ headless: false });
const page = await browser.newPage();
await page.setViewport({ width: 1920, height: 1080});
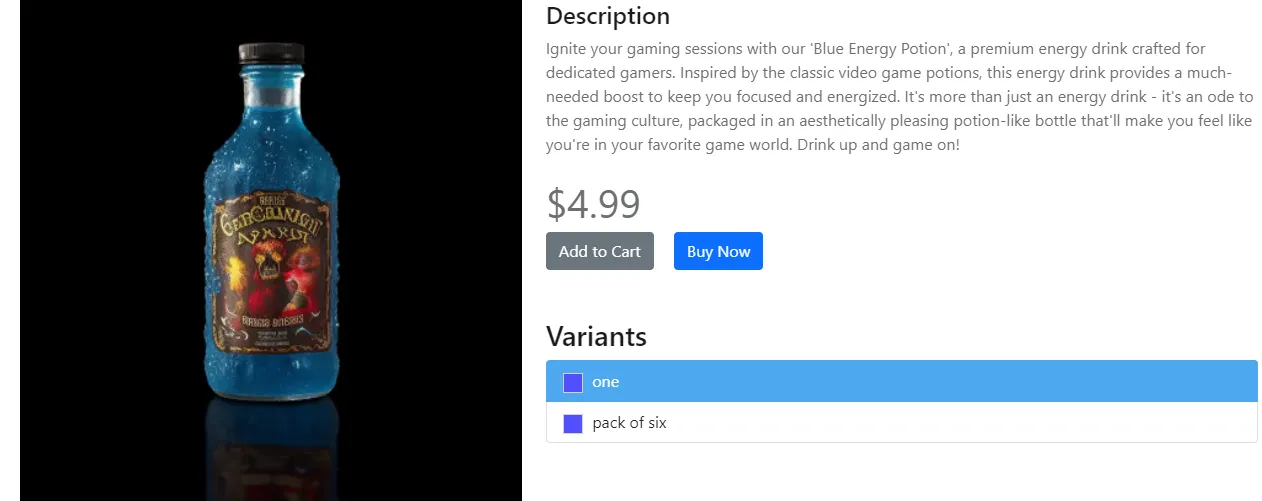
await page.goto("https://web-scraping.dev/product/5");
// select the element using a css selector
const element = await page.$("div.product-data");
await element.screenshot({path: "element-screenshot.png", type: "png"});
browser.close();
}Here's what the retrieved Pupepteer screenshot looks like:
For further details on web scraping with Puppeteer, refer to our dedicated guide.
Need screenshots at production scale? Use a Screenshot API service. Our screenshot API roundup helps you pick the right one.


